
天问之路
AFL
参数
1 | |
数据类型说明
1 | |
afl-gcc
afl-gcc实质上是对gcc或clang的封装(wrapper),它在编译的命令行参数中加入了一定的参数并调用gcc或clang实现对于关键节点的代码插桩,编译生成汇编代码,从而记录程序执行路径之类的关键信息,对程序的运行情况进行反馈。
核心函数
find_as
查找 afl-as 的具体位置。
- 首先尝试从环境变量中获取 AFL_PATH ,如果存在就赋值给 afl_path,然后检查
afl_path拼接上/as的文件是否可以执行,如果可以执行,那么将该路径赋值给 as_path。 - 如果不存在 AFL_PATH 这个环境变量,则检查 argv0,例如(”~/AFL/afl-gcc”)中是否存在 ‘/‘,如果有就找到最后一个 ‘/‘ 所在的位置,并取其前面的字符串作为 dir,然后检查
dir拼接上/afl-as的文件是否可以执行,如果可以执行,那么将该路径赋值给 as_path。 - 如果上述两种方式都失败,则抛出异常。
edit_params
将 argv 拷贝到 u8 **cc_params,然后进行相应的处理。
- 首先通过 ck_alloc 来为 cc_params 分配内存,分配的长度为
(argc+128)*8。 - 然后检查 argv[0] 是否存在 ‘/‘ ,如果不存在就 argv[0] 赋值 给 name,如果存在就找到最后一个 ‘/‘ 所在的位置,将 ‘/‘ 后面的字符串赋值给 name。
- 比较 name 和 afl-clang:
- 如果相同,则设置 clang_mode 为 1 ,然后设置环境变量 CLANG_ENV_VAR 为 1。
- 然后比较 name 和 afl-clang++:
- 如果相同,则获取环境变量
AFL_CXX的值,如果该值存在,则将 cc_params[0] 设置为该值,如果不存在,就设置为 clang++。 - 如果不相同,则获取环境变量
AFL_CC的值,如果该值存在,则将 cc_params[0] 设置为该值,如果不存在,就设置为 clang。
- 如果相同,则获取环境变量
- 然后比较 name 和 afl-clang++:
- 如果不相同,则比较 name 和 afl-g++:
- 如果相同,则获取环境变量
AFL_CXX的值,如果该值存在,则将 cc_params[0] 设置为该值,如果不存在,就设置为 g++。 - 如果不相同,则比较 name 和 afl-gcj,相同,则获取环境变量
AFL_GCJ的值,如果该值存在,则将 cc_params[0] 设置为该值,如果不存在,就设置为 gcj。 - 如果不相同,则获取环境变量
AFL_CC的值,如果该值存在,则将 cc_params[0] 设置为该值,如果不存在,就设置为 gcc。
- 如果相同,则获取环境变量
- 如果相同,则设置 clang_mode 为 1 ,然后设置环境变量 CLANG_ENV_VAR 为 1。
- 进入 while 循环,遍历从 argv[1] 开始的 argv 参数:
- 如果存在
-B/integrated-as/-pipe,直接跳过。 - 如果存在
-fsanitize=address或者-fsanitize=memory,设置 asan_set 为 1。用于告诉 gcc 要检查内存访问的错误,比如数组越界之类。 - 如果存在
FORTIFY_SOURCE,设置 fortify_set 为 1。主要用于进行缓冲区溢出问题的检查,检查的常见函数有memcpy, mempcpy, memmove, memset, strcpy, stpcpy, strncpy, strcat, strncat, sprintf, vsprintf, snprintf, gets等。 - 最后对
cc_params进行赋值cc_params[cc_par_cnt++] = cur
- 如果存在
- 然后开始设置其他的 cc_params 参数
- 取之前计算出来的
as_path,然后设置-B as_path,-B选项用于设置编译器的搜索路径。 - 如果是 clang_mode 为 1,则设置
-no-integrated-as - 如果存在 AFL_HARDEN 环境变量,则设置
-fstack-protector-all,并且如果没有设置 fortify_set,则追加-D_FORTIFY_SOURCE=2 - sanitizer
- 如果 asan_set 在上面被设置为 1,则将环境变量
AFL_USE_ASAN赋值为 1。 - 如果 asan_set 没有被设置为 1,但存在 AFL_USE_ASAN 环境变量,则设置
-U_FORTIFY_SOURCE -fsanitize=address - 如果不存在 AFL_USE_ASAN 环境变量,但存在 AFL_USE_MSAN 环境变量,则设置
U_FORTIFY_SOURCE -fsanitize=memory - 不能同时指定
AFL_USE_ASAN或者AFL_USE_MSAN,也不能同时指定AFL_USE_MSAN和AFL_HARDEN,因为这样运行时速度过慢
- 如果 asan_set 在上面被设置为 1,则将环境变量
- 如果不存在 AFL_DONT_OPTIMIZE 环境变量,则设置
-g -O3 -funroll-loops -D__AFL_COMPILER=1 -DFUZZING_BUILD_MODE_UNSAFE_FOR_PRODUCTION=1 - 如果存在 AFL_NO_BUILTIN 环境变量,表示允许进行优化,则设置
-fno-builtin-strcmp等
- 取之前计算出来的
- 最后
cc_params[cc_par_cnt] = NULL;终止对 cc_params 的编辑
main函数
1 | |
添加一行打印代码,打印出 afl-gcc 编译使用的参数。
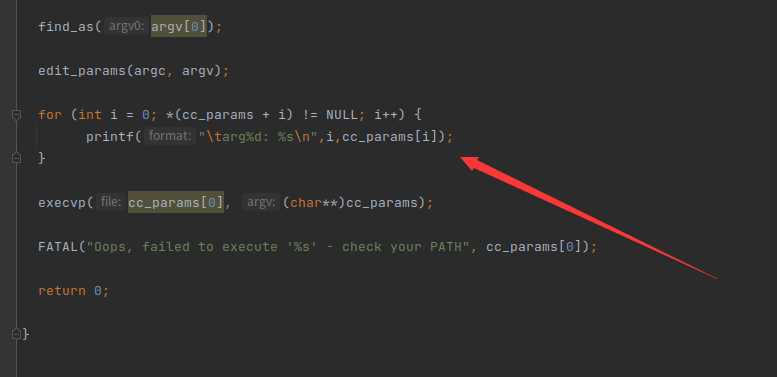 image-20230217195528090
参数如下:
 image-20230217195540657
小结
总结来说,afl-gcc是对gcc的一层封装,主要是在相应的编译选项中加入-B参数(也加入一些必要的参数和优化的参数),指定特定的编译器搜索路径,最终 gcc 进行编译时,会调用afl-as来进行汇编。
afl-as
核心函数
edit_params
在 gcc 中,.s文件是最后一个参数,因此该函数作用是正常保存其他参数,设置好系统类型,以及对最后一个参数——汇编文件路径进行相应的修改,便于后续对原有的汇编文件进行插桩。
- 依次检查是否存在 TMPDIR/TEMP/TMP 等环境变量,存在则将其值赋给 tmp_dir,如果都不存在则把 ‘/tmp’ 赋值给 tmp_dir。
- 为 as_pramas 申请大小为 (argc + 32) * 8 的内存空间。
- 检查是否存在环境变量 AFL_AS,若存在则将其值赋给 afl_as,否则设置 afl_as 为 ‘as’
- 设置 as_params[argc] 为 0,as_par_cnt 初始值为1
- 从 argv[1] 开始遍历到 argv[argc-1]:
- 如果存在字符串
--64, 则设置 use_64bit = 1;如果存在字符串--32,则设置 use_64bit = 0。对于__APPLE__,如果存在-arch x86_64,设置 use_64bit = 1,并跳过 -q 和 -Q 选项; as_params[as_par_cnt++] = argv[i];设置 as_params 的值为 argv 对应的参数值。
- 如果存在字符串
- 开始设置其他的参数
- 对于
__APPLE__,如果设置了 use_clang_as 为 1,则设置-c -x assembler参数。 - 将 argv[argc - 1] 赋值给 input_file。
- 如果 input_file 的首字符为 ‘-‘,是 ‘-version’ 则设置 just_version = 1,modified_file = input_file,然后跳转到 wrap_things_up,说明只是为了显示 version 信息,如果不是 ‘-version’ 则抛出异常。
- 如果 input_file 首字符不为 ‘-‘,比较 input_file 与 tmp_dir、’/var/tmp’、’/tmp’ 的前 strlen(tmp_dir)/9/5个字节是否相同,如果不相同,则设置 pass_thru 为 1。
- 设置 modified_file 的值为
alloc_printf("%s/.afl-%u-%u.s", tmp_dir, getpid(),(u32) time(NULL));,即tmp_dir/.afl-pid-time.s格式的字符串。 - 设置
as_params[as_par_cnt++] = modified_file。 as_params[as_par_cnt] = NULL。
- 对于
add_instrumentation
处理输入文件,生成 modified_file,将 instrumentation 插入所有适当的位置。
如果 input_file 不为空,则尝试以流形式打开,成功则将 FILE* 指针赋值给 inf,失败则抛出异常;如果 input_file 为空,则将 stdin 赋值给 inf。
用创建写打开 modified_file 对应的文件,并获取其句柄 outfd,再根据句柄通过 fdopen 函数转换为 FILE* 指针 outf。
while 循环通过 fgets 从 inf 中逐行读取内容保存到 line 数组里,每行最多读取的字节数是 MAX_LINE(8192),这个值包括 ‘\0’,所以实际读取的有内容的字节数是 MAX_LINE - 1 个字节。
对于读入的每一行,先判断插桩的条件是否满足(
!pass_thru && !skip_intel && !skip_app && !skip_csect && instr_ok && instrument_next && line[0] == '\t' && isalpha(line[1]),如果满足则直接往 outf 插入插桩代码(trampoline_fmt_64或trampoline_fmt_32,根据是32位还是64位),插桩完成后,表明该基本块已经完成插桩,后面的代码无需插桩,将instrument_next置位0,并将插桩计数器ins_lines加一。pass_thru标志位是在edit_params中设定的。skip_intel用来标志跳过 intel 汇编语法。skip_app用来标志跳过ad-hoc __asm__(内联汇编)。skip_csect则是用来标志off-flavor assembly。instr_ok用来标志是否需要插桩。instrument_next用来标志后续的代码是否还需要插桩。
把 line 数组里的读取内容写入到 outf 对应的文件里。
如果 pass_thru 为 1,直接跳过插桩。
如果 line 的值是
\t.[text\n|section\t.text|section\t__TEXT,__text|section __TEXT,__text]...其中之一,则设置 instr_ok 为 1,然后开始新的 while 循环,去读取下一行的数据到 line 数组里。如果 line 的值是
\t.[section\t|section |bss\n|data\n]...其中之一,则设置 instr_ok 为 0,然后开始新的 while 循环,去读取下一行的数据到 line 数组里。然后进行设置 skip_csect 、 skip_intel 、skip_app 等标志的值。
```c
^main: - function entry point (always instrumented) ^.L0: - GCC branch label ^.LBB0_0: - clang branch label (but only in clang mode) ^\tjnz foo - conditional branches /* 对于 main 函数的入口(^main:)需要插桩,因为需要初始化; 对于分支条件的标签后面(gcc是^.L0:,clang是^.LBB0_0:)需要插桩,因为它是条件跳转的目标地址; 对于跳转指令(^\tjnz foo)后面也需要插桩,因为该指令的后面形成了分支 */ ...but not: ^# BB#0: - clang comments ^ # BB#0: - ditto ^.Ltmp0: - clang non-branch labels ^.LC0 - GCC non-branch labels ^.LBB0_0: - ditto (when in GCC mode) ^\tjmp foo - non-conditional jumps /* 而对于注释(^# BB#0:以及^ # BB#0:)不需要插桩; 绝对跳转的目标地址(^.Ltmp0:、^.LC0以及^.LBB0_0:)不需要插桩,因为没有形成新的分支或路径; 绝对跳转指令(^\tjmp foo)也无需插桩。*/1
2
3
4
5
6
7
8
9
10
11
12
13
14
15
16
17
18
19
20
21
22
23
24
25
26
27
28
29
30
31
32
33
34
35
36
37
38
39
40
41
42
43
44
45
46
47
48
49
50
51
52
53
54
55
56
57
58
59
60
61
62
63
64
65
66
67
68
69
70
71
72
73
74
75
76
77
78
79
80
- 因此后续代码检测指令是否为绝对跳转指令 jmp `line[1] == 'j' && line[2] != 'm'`,如果不是则在该指令的后面直接插入插桩代码。inst_ratio 是我们之前设置的插桩密度,默认值为 100,如果设置了 asan 之类的就会默认设置成 33 ;并将插桩计数器`ins_lines`加一;然后开始新的 while 循环。
- 先检查 line 该行中是否存在`:`,然后检查是否以`.`开始
- 如果以`.`开始,则表示想对`^.L0:`或者`^.LBB0_0:`这样的 branch label 进行插桩。判断依据是 line[2] 是否为数字,或者在 clang 模式下,line[1] 开始的三个字节是否为 LBB。然后将 instrument_next 置 1。
- 否则代表这是一个 function,插桩`^func:`function entry point,然后将 instrument_next 置 1。
- 如果插桩计数器 ins_lines 不为 0,则最终依据架构,向 outf 写入插桩的主体功能代码 main_payload_64 或者 main_payload_32。
- 最后关闭 inf 和 outf。
afl 的插桩过程十分简单,首先只对 .text 进行插桩,然后通过汇编的前导命令来判断是否是一个跳转分支或者一个函数,然后插入 `instrumentation trampoline`。
#### main 函数
- 读取环境变量 AFL_INST_RATIO 的值,将其赋值给 inst_ratio_str。
- 设置 srandom 的随机种子为`rand_seed = tv.tv_sec ^ tv.tv_usec ^ getpid();`
- 设置环境变量 AS_LOOP_ENV_VAR 的值为 1。
- 读取环境变量 AFL_USE_ASAN 和 AFL_USE_MSAN 的值,如果其中有一个为 1,则设置 sanitizer 为 1,且将 inst_ratio 除以 3。
- 这是因为 AFL 无法在插桩的时候识别出 ASAN specific branches,所以会插入很多无意义的桩,为了降低这种概率,粗暴的将整个插桩的概率都除以3
- edit_params(argc, argv)
- add_instrumentation()
- fork出一个子进程,让子进程来执行 `execvp(as_params[0], (char **) as_params);`
- 这是因为 execvp 执行的时候,会用`as_params[0]`来完全替换掉当前进程空间中的程序,如果不通过子进程来执行实际的 as,那么后续就无法在执行完实际的 as 之后,还能 unlink 掉 modified_file。
- `waitpid(pid, &status, 0)`等待子进程结束
- 读取环境变量AFL_KEEP_ASSEMBLY的值,如果没有设置这个环境变量,就unlink掉modified_file。
#### 小结
`afl-as`的主要功能是逐行对前面编译生成的汇编代码进行遍历,在恰当的位置插入相应的插桩代码(`trampoline_fmt`)并在最末尾插入相应的功能代码(`main_payload`),最终调用原生的`as`来生成二进制文件,从而实现对二进制文件的插桩。
#### instrumentation trampoline 和 main_payload
`trampoline_fmt_64/32`定义在 `afl-as.h` 头文件中,代码执行功能为保存好寄存器 rdx,rcx,rax(32位多个 edi) 的值,rcx 取值设为随机数R(MAP_SIZE),以此来区分每个分支点,显然最关键处在于 `__afl_maybe_log`。
```c
static const u8* trampoline_fmt_32 =
"\n"
"/* --- AFL TRAMPOLINE (32-BIT) --- */\n"
"\n"
".align 4\n"
"\n"
"leal -16(%%esp), %%esp\n"
"movl %%edi, 0(%%esp)\n"
"movl %%edx, 4(%%esp)\n"
"movl %%ecx, 8(%%esp)\n"
"movl %%eax, 12(%%esp)\n"
"movl $0x%08x, %%ecx\n" // 向 ecx 中存入识别代码块的随机桩代码 id
"call __afl_maybe_log\n" // 调用 __afl_maybe_log 函数
"movl 12(%%esp), %%eax\n"
"movl 8(%%esp), %%ecx\n"
"movl 4(%%esp), %%edx\n"
"movl 0(%%esp), %%edi\n"
"leal 16(%%esp), %%esp\n"
"\n"
"/* --- END --- */\n"
"\n";
static const u8* trampoline_fmt_64 =
"\n"
"/* --- AFL TRAMPOLINE (64-BIT) --- */\n"
"\n"
".align 4\n"
"\n"
"leaq -(128+24)(%%rsp), %%rsp\n"
"movq %%rdx, 0(%%rsp)\n"
"movq %%rcx, 8(%%rsp)\n"
"movq %%rax, 16(%%rsp)\n"
"movq $0x%08x, %%rcx\n" // 64 位下使用的寄存器为 rcx
"call __afl_maybe_log\n" // 调用 __afl_maybe_log 函数
"movq 16(%%rsp), %%rax\n"
"movq 8(%%rsp), %%rcx\n"
"movq 0(%%rsp), %%rdx\n"
"leaq (128+24)(%%rsp), %%rsp\n"
"\n"
"/* --- END --- */\n"
"\n";
编译之后的桩代码:
1 | |
从 main_payload_64 中的主要变量:
1 | |
main_payload —— __afl_maybe_log
1 | |
首先,使用 lahf 指令(加载状态标志位到AH)将EFLAGS寄存器的低八位复制到 AH,被复制的标志位包括:符号标志位(SF)、零标志位(ZF)、辅助进位标志位(AF)、奇偶标志位(PF)和进位标志位(CF),使用该指令可以方便地将标志位副本保存在变量中;
然后,使用 seto 指令,如果存在溢出,则将 al 设置为 1;
接下来检查共享内存是否进行了设置,判断 __afl_area_ptr 是否为NULL:
- 如果为 NULL,跳转到
__afl_setup函数进行设置; - 如果不为 NULL,继续进行。
1 | |
首先,检查 __afl_setup_failure 是否为0,为 0 直接跳转到 __afl_return 返回;
然后,检查 __afl_global_area_ptr 文件指针是否为 NULL:
- 如果为 NULL,跳转到
__afl_setup_first进行初始化的工作; - 如果不为 NULL,将
__afl_global_area_ptr的值赋给__afl_area_ptr,然后跳转到__afl_store。
1 | |
首先,保存所有寄存器的值,包括 xmm 寄存器组;
然后,进行栈对齐;
然后,调用 _getenv 获取环境变量 .AFL_SHM_ENV(“SHM_ENV_VAR”),该环境变量保存的是共享内存的 ID:
- 如果获取失败,跳转到
__afl_setup_abort; - 如果获取成功,先调用
_atoi把 ID 转为 int 数值,再调用_shmat,启用对共享内存的访问,启用失败则跳转到__afl_setup_abort。
接下来,将 _shmat 返回的共享内存地址存储在 __afl_area_ptr 和 __afl_global_area_ptr 变量中。
后面按序执行到 __afl_forkserver:
1 | |
这一段实现的主要功能是往 FORKSRV_FD + 1 (也就是 198+1)号描述符中(即状态管道)中, 写入__afl_temp上的 4 个字节内容,用来告知 fork server 已经成功启动。
1 | |
- 等待fuzzer通过
FORKSRV_FD( 控制管道)发送过来的命令,读入到__afl_temp中:- 读取失败,跳转到
__afl_die,结束循环; - 读取成功,继续往下执行;
- 读取失败,跳转到
- fork 一个子进程,子进程跳转执行
__afl_fork_resume; - 将子进程的 pid 赋给
__afl_fork_pid,并写到状态管道中通知父进程; - 等待子进程执行完成,写入状态管道告知 fuzzer;
- 重新执行下一轮
__afl_fork_wait_loop
1 | |
- 关闭子进程中的 fd;
- 恢复子进程的寄存器状态;
- 跳转到
__afl_store执行。
1 | |
- rcx 存储的是 R(MAP_SIZE) 随机数,值在 0~((1 << 16) - 1) 之间,是当前桩的一个 id。
- 将
__afl_prev_loc与 rcx 异或两次,最终把值赋给__afl_prev_loc。可以看见,当第一个进程执行到这时,__afl_prev_loc为 0,最终会被赋值为当前桩 id 逻辑右移一位的值。 - 最后在共享内存(rdx存储的地址指向共享内存)中存储当前插桩位置的地方计数加一。
afl-clang-fast
AFL 对于上述通过afl-gcc来插桩这种做法已经属于不建议,并提供了更好的工具 afl-clang-fast,通过 llvm pass 来插桩。
LLVM
LLVM 是一个编译器框架,主要为了解决编译时多种多样的前端和后端导致编译环境复杂、苛刻的问题,LLVM IR 是 LLVM 的中间表示,并以库的形式提供一些列接口,以提供诸如操作 IR、生成目标平台代码等等后端的功能。其整体架构如下所示:
 image-20230222191158864
不同的前端和后端使用统一的中间代码,因此,如果需要支持一门新的编程语言,只需要实现一个新的前端;如果需要支持一款新的硬件设备,只需要实现一个新的后端,而优化阶段为通用阶段,依靠的是统一的 LLVM IR ,与新的编程语言和硬件设备无关。
Clang 是 LLVM 项目的一个子项目,它是 LLVM 架构下的 C/C++/Objective-C 的编译器,是 LLVM 前端的一部分。相较于 GCC,具备编译速度快、占用内存少、模块化设计、诊断信息可读性强、设计清晰简单等优点。
代码首先由编译器前端 clang 处理后得到中间代码 IR,然后经过各 LLVM Pass 进行优化和转换,最终交给编译器后端生成机器码。(以 Clang 做编译器为例):
 image-20230222191953401
LLVM Pass 是一些中间过程,用户可以自定义其内容,因此可以遍历、修改 IR 以达到插桩、优化、静态分析等目的。
clang wrapper
afl-clang-fast.c和之前的afl-gcc一样,是 clang 的一层 wrapper;只是定义了一些宏,和传递了一些参数给 clang。
find_obj
通过查找afl-llvm-rt.o所在路径,从而确定obj_path的值。
- 先检查环境变量
AFL_PATH是否存在,如果存在,接着检查AFL_PATH拼接上/afl-llvm-rt.o是否可读,如果可读就把该路径赋值给obj_path,然后直接返回。 - 如果不存在环境变量
AFL_PATH,则检查 arg0 中是否存在 ‘/‘,存在的则将最后一个 ‘/‘ 位置之前的路径赋值给 dir,例如~/AFL/afl-clang-fast则把~/AFL赋值给 dir。接着检查 dir 拼接上/afl-llvm-rt.o是否可读,如果可读就把该路径赋值给obj_path,然后直接返回。 - 如果都不存在时,因为默认的 AFL 的 MakeFile 在编译的时候,会定义一个名为
AFL_PATH的宏,其指向/usr/local/lib/afl,会到这里查看是否存在afl-llvm-rt.o,如果存在设置obj_path并直接返回。 - 如果上述三种方式都找不到,则抛出异常。
edit_params
将 argv 的参数拷贝到 cc_params,同时设置一些必要的参数。
获取 argv[0] 的值,判断执行的是
afl-clang-fast还是afl-clang-fast++- 如果执行的是
afl-clang-fast,则读取环境变量AFL_CXX,如果存在,则将其值赋值给cc_params[0],否则将 clang++ 赋值给cc_params[0]。 - 如果执行的是
afl-clang-fast++则读取环境变量AFL_CC,如果存在,则将其值赋值给cc_params[0],否则将 clang 赋值给cc_params[0]。
- 如果执行的是
默认情况下,我们通过
afl-llvm-pass.so来注入 instrumentation,但是现在也支持trace-pc-guard模式,详情可以参考llvm的文档然后如果定义了
USE_TRACE_PC宏,就将-fsanitize-coverage=trace-pc-guard -mllvm -sanitizer-coverage-block-threshold=0添加到cc_params里。如果没有定义,就依次将
-Xclang -load -Xclang obj_path/afl-llvm-pass.so -Qunused-arguments添加到cc_params里。循环依次读取传递给
afl-clang-fast的参数,并添加到cc_params里,同时做一些检查和设置:- 如果传入参数里有
-m32或者armv7a-linux-androideabi,则设置bit_mode为 32。 - 如果传入参数里有
-m64,则设置bit_mode为 64 - 如果传入参数里有
-x,则设置x_set为 1 - 如果传入参数里有
-fsanitize=address或者-fsanitize=memory,则设置asan_set为 1 - 如果传入参数里有
-Wl,-z,defs或者-Wl,--no-undefined,直接 continue,不将其添加到cc_params里 。
- 如果传入参数里有
读取环境变量
AFL_HARDEN,如果存在,则往cc_params里添加-fstack-protector-all;并且如果 fortify_set 为 0,往cc_params里添加-D_FORTIFY_SOURCE=2。如果参数里没有
-fsanitize=address/memory,即 asan_set 是 0,则读取环境变量AFL_USE_ASAN,如果存在就添加-U_FORTIFY_SOURCE -fsanitize=address到cc_params里,环境变量AFL_USE_MSAN则是添加-U_FORTIFY_SOURCE -fsanitize=memory,并且和AFL_HARDEN三者是互相排斥的。如果定义了
USE_TRACE_PC宏,检查是否存在环境变量AFL_INST_RATIO,如果存在就抛出异常AFL_INST_RATIO not available at compile time with 'trace-pc'.。读取环境变量
AFL_DONT_OPTIMIZE,如果不存在则添加-g -O3 -funroll-loops到cc_params里。读取环境变量
AFL_NO_BUILTIN,如果存在就添加-fno-builtin-strcmp等。接着,往
cc_params添加参数-D__AFL_HAVE_MANUAL_CONTROL=1 -D__AFL_COMPILER=1 -DFUZZING_BUILD_MODE_UNSAFE_FOR_PRODUCTION=1,以及定义一些宏。如果 x_set 为 1,则添加参数
-x none。根据
bit_mode的值选择afl-llvm-rt:- 如果为 0,即没有
-m32和-m64选项,就向参数里添加obj_path/afl-llvm-rt.o - 如果为 32,添加
obj_path/afl-llvm-rt-32.o - 如果为 64,添加
obj_path/afl-llvm-rt-64.o
- 如果为 0,即没有
最后以 NULL 结尾,停止添加参数。
main
- 寻找 obj_path 路径。
- 编辑参数 cc_params。
- 最后执行设置好的命令参数
execvp(cc_params[0], (char**)cc_params);。
afl-llvm-pass.so.cc
afl-llvm-pass 里只有一个 Transform pass AFLCoverage,其继承自 ModulePass,所以我们主要分析一下它的runOnModule函数。
Module
Module 相当于程序,里面包含所有 Function 和全局变量,而 Function 里包含所有 BasicBlock 和函数参数,BasicBlock 里包含所有 Instruction,Instruction 包含 Opcode 和 Operands。
 image-20230303100507191
注册 pass
1 | |
其核心功能为向 PassManager 注册新的 pass,每个 pass 相互独立,通过PM统一注册和调度,更加模块化。不理解的可以参考下面的代码:
1 | |
runOnModule
首先定义了一个继承自 ModulePass 的 AFLCoverage 类。
1
2The ModulePass class is the most general of all superclasses that you can use. Deriving from ModulePass indicates that your pass uses the entire program as a unit, referring to function bodies in no predictable order, or adding and removing functions.
ModulePass类是所有可使用的超类中最通用的。从ModulePass派生指示您的pass将整个程序作为一个单元,以不可预测的顺序引用函数体,或者添加和删除函数。因此选择继承不同类型的 Pass 父类就是从不同的粒度对程序进行处理。这里选择继承 ModulePass 就是对整个程序都进行处理。
然后在类外,对类中的静态成员变量 ID 进行定义及初始化。该变量是 pass 标识符,即 LLVM 用于唯一标识 pass 。同时,在类外定义 runOnModule() 函数,该函数内容便是实现真正需求的部分。
通过 getContext 来获取 LLVMContext,其保存了整个程序里分配的类型和常量信息。
1
2
3
4This is an important class for using LLVM in a threaded context. It (opaquely) owns and manages the core “global” data of LLVM’s core infrastructure, including the type and constant uniquing tables.
LLVMContext itself provides no locking guarantees, so you should be careful to have one context per thread.
这是在线程上下文中使用 LLVM 的一个重要类。它(不透明地)拥有和管理LLVM核心基础设施的核心“全局”数据,包括类型和常量唯一表。
LLVMContext 本身不提供锁定保证,因此您应该小心为每个线程提供一个上下文。通过 LLVMContext 来获取 type 实例 Int8Ty 和 Int32Ty:
- Type 是所有 type 类的一个超类(父类)。每个 Value 都有一个 Type,所以这经常被用于寻找指定类型的 Value。Type 不能直接实例化,只能通过其子类实例化。某些基本类型(VoidType、LabelType、FloatType 和 DoubleType)有隐藏的子类。之所以隐藏它们,是因为除了 Type 类提供的功能之外,它们没有提供任何有用的功能,除了将它们与Type 的其他子类区分开来之外。所有其他类型都是 DerivedType 的子类。Types 可以被命名,但这不是必需的。一个给定 Type 在任何时候都只存在一个实例。这允许使用 Type 实例的地址相等来执行 type 相等。也就是说,给定两个 Type* 值,如果指针相同,则 types 相同。
读取环境变量 AFL_INST_RATIO,并且将其赋值给变量 inst_ratio_str,如果有值,则将其值赋给 inst_ratio,如果没有值则 inst_ratio 默认值为 100,这个值代表一个插桩概率,如果为 100 则表示每个分支都必定插桩,如果有了变化,就可以决定是否要在这个分支插桩。
定义两个全局变量:
AFLMapPtr 是一个用来指向共享内存映射到进程空间的地址;AFLPreLoc 是一个用来表示前一个基本块的编号。
1
2关于GlobalVariable的构造函数官方介绍如下:
GlobalVariable(const Type *Ty, bool isConstant, LinkageTypes &Linkage, Constant Initializer = 0, const std::string &Name = “”, Module Parent = 0)
遍历每个基本块,获取其第一条指令的迭代器,使用获取到的迭代器创建一个 IRBuilder 类的实例,通过该实例就能很方便地创建一些指令,并插在插入点。
1
2IRBuilder is used as a convenient way to create LLVM instruvtions with a consistent and simplified interface. And then insert them into a basic block.
IRBuilder 是一种创建 LLVM 指令的方便方法,具有一致和简化的接口。然后把它们插入一个基本块。取 0~MAP_SIZE 之间的一个值作为当前基本块的编号。
```
在 LLVM 中,无论是全局变量还是局部变量都是指针类型的,所以需要使用 CreatedLoad() 方法来获取值,CreatedStore() 方法来赋值,Load 和 Store 就是一对访问内存的指令。然后使用 CreateZExt 来完成相应的类型转换。Value 类是其他众多重要类的超类,如 Instruction 和 Function。1
2
3
4
5
6
7
8
9
10
11
- 通过 CreatedLoad() 方法获取上一个基本块的编号并转换成相应类型,Metadata 可以看作是一种调试信息。
- 获取指向共享内存区域的指针。并通过 CreateGEP 方法获取共享内存里指定 index 的指针,而 index 是通过当前基本块的编号和上一个基本块的编号异或计算得到的。
- 用 CreateLoad() 方法将 index 地址处的值取出赋值给 Counter。
- 将 Counter 值加一后,再将值存入 index 地址处。
- 将当前基本块的编号右移一位并赋值给 AFLPreLoc,即更新`__afl_prev_loc`的值。之所以要将当前基础块编号右移一位,是因为当基础块跳转A->A和B->B,或A->B和B->A,它们的编号做异或后的结果是相同的,无法区分,所以其中一个编号要右移一位。
1
2
3
- 总的来说就是通过遍历每个基本块,向其中插入实现了如下伪代码功能的 instruction ir 来进行插桩:cur_location =
;
shared_mem[cur_location ^ prev_location]++;
prev_location = cur_location >> 1;1
2
3
4
5
6
7
8
9
10
11
12
13
14
15
16
17
18
19
20
21
- 作用:

  - 当有控制流到达当前基础块时,其共享内存对应位置,用于计数的值就会加一
  - 而AFL可以根据该共享内存上的数据来判断控制流的覆盖程度,调整输入样本,使控制流能够覆盖更多的基础块

### afl-llvm-rt.o.c


## afl-fuzz

### 初始配置

#### while循环

```c
while ((opt = getopt(argc, argv, "+i:o:f:m:b:t:T:dnCB:S:M:x:QV")) > 0)
    	...
刚开始使用getopt函数获取输入的选项参数。
setup_signal_handlers
先了解一下常见的信号:
| 信号名称 | 说明 |
|---|---|
| SIGALRM | 由alarm函数设置的定时器产生 |
| SIGHUP | 由一个处于非连接状态的终端发送给控制进程,或者由控制进程在自身结束时发送给每个前台进程 |
| SIGINT | 一般由从终端敲入的Crtl+C组合键或预先设置好的中断字符产生 |
| SIGKILL | shell中使用其来强制终止异常进程 |
| SIGPIPE | 如果向管道写数据时没有与之对应的读进程,就会产生这个信号 |
| SIGTERM | 作为一个请求被发送,要求进程结束运行。UNIX关机时用这个信号要求系统服务停止运行。它是kill命令默认发送的信号 |
| SIGUSR1,SIGUSR2 | 进程之间可以用这个信号进行通信,例如让进程报告状态信息等 |
check_asan_opts
fix_up_sync
fuzz执行
变异策略
memset_sakura_array
初始化了两个数组:simplify_lookup和count_class_lookup8。
库函数
getenv()
char *getenv(const char *name)搜索 name 所指向的环境变量,并返回一个以 null 结尾的字符串,该字符串为被请求的环境变量的值。如果该环境变量不存在,则返回 NULL。
setenv()
int setenv(const char *name, const char *value, int overwrite);先检查 overwrite 是否为 0 ,如果不为 0 ,则将 name 指向的环境变量的值替换为 *value ,如果为 0 ,且 name 指向的环境变量存在,则会忽略 *value
access()
int access(const char *pathname, int mode)判断指定的文件或目录是否存在(F_OK),已存在的文件或目录是否有可读(R_OK)、可写(W_OK)、可执行(X_OK)权限。F_OK、R_OK、W_OK、X_OK这四种方式通过access函数中的第二个参数mode指定。如果指定的方式有效,则此函数返回0,否则返回-1。
gettimeofday()
int gettimeofday (struct timeval * tv, struct timezone * tz)gettimeofday()会把目前的时间放到 tv 所指的结构,当地时区的信息则放到 tz 所指的结构中。timeval 结构定义为: struct timeval{ long tv_sec; //秒 long tv_usec; //微秒 }; timezone 结构定义为: struct timezone { int tz_minuteswest; //和Greenwich 时间差了多少分钟 int tz_dsttime; //日光节约时间的状态 };
srandom()
- 生产随机数需要种子(Seed),且如果种子固定,random()每次运行生成的随机数(其实是伪随机数)也是固定的;因为返回的随机数是根据稳定的算法得出的稳定结果序列,并且Seed就是这个算法开始计算的第一个值。
- srandom()可以设定种子,比如srandom(0) 、srandom(1)等等,没设置时默认为种子为1。如果srandom设定了一个固定的种子,那么random得出的随机数就是固定的。
- 如果程序运行时通过srandom(time(NULL))设定种子为随机的,那么random()每次生成的随机数就是非固定的。
getopt()
int getopt(int argc, char *const argv[], const char *optstring)getopt()用来分析命令行参数。参数argc 和argv 是由main()传递的参数个数和内容。
参数optstring 则代表欲处理的选项字符串。
此函数会返回在argv 中下一个的选项字母,此字母是对应参数optstring 中的字母。
如果选项字符串里的字母后接着一个冒号”:”,则表示必须有相关的参数,如果字母后接两个冒号”::”,则表示相关参数是可选的,相关参数的首地址赋给全局变量optarg。
返回值:如果找到符合的参数则返回此参数字母, 如果参数不包含在参数optstring 的选项字母则返回”?”字符,分析结束则返回-1.
memcpy()
void *memcpy(void *str1, const void *str2, size_t n)从存储区 str2 复制 n 个字节到存储区 str1。- 该函数返回一个指向目标存储区 str1 的指针。
strchr()
-
char *strchr(const char *str, int c)在参数 str 所指向的字符串中搜索第一次出现字符 c(一个无符号字符)的位置。 - 该函数返回在字符串 str 中第一次出现字符 c 的位置,如果未找到该字符则返回 NULL。
-
strrchr()
-
char *strrchr(const char *str, int c)在参数 str 所指向的字符串中搜索最后一次出现字符 c(一个无符号字符)的位置。 - 该函数返回 str 中最后一次出现字符 c 的位置。如果未找到该值,则函数返回一个空指针。
-
strstr()
char *strstr(const char *haystack, const char *needle)在字符串 haystack 中查找第一次出现字符串 needle 的位置,不包含终止符 ‘\0’。- 该函数返回在 haystack 中第一次出现 needle 字符串的位置,如果未找到则返回 null。
sscanf()
int sscanf(const char *str, const char *format, ...)从字符串读取格式化输入到填入的参数(…省略的是参数)里。- 如果成功,该函数返回成功匹配和赋值的个数。如果到达文件末尾或发生读错误,则返回 EOF。
open()
int open(const char * pathname, int flags)打开一个文件。- 下列为常见的flag取值:
- 参数 pathname 指向欲打开文件的路径字符串, flag为打开的模式。
- O_RDONLY 以只读方式打开文件。
- O_WRONLY 以只写方式打开文件。
- O_RDWR 以可读写方式打开文件。上述三种旗标是互斥的,不可同时使用。
- O_CREAT 若欲打开的文件不存在则自动建立该文件。
- O_SYNC 以同步的方式打开文件。
sigemptyset()
int sigemptyset(sigset_t *set)该函数的作用是将信号集初始化为空。
kill()
int kill(pid_t pid, int sig)kill()可以用来送参数 sig 指定的信号给参数 pid 指定的进程。- 成功时返回0,调用失败返回-1。
- pid 说明:
- pid>0 将信号传给进程识别码为 pid 的进程。
- pid=0 将信号传给和目前进程相同进程组的所有进程。
- pid=-1 将信号广播传送给系统内所有的进程。
- pid<0 将信号传给进程组识别码为 pid 绝对值的所有进程参数 sig 代表的信号编号。
alarm()
unsigned int alarm(unsigned int seconds)alarm() 函数用来在 seconds 秒之后安排发送一个 SIGALRM 信号,如果 seconds 为 0,将取消所有已设置的闹钟请求。- alarm() 函数的返回值是,设置的闹钟时间的余留秒数,如果失败返回 -1。
fdopen()
int fdopen(int handle,char* type);将流与文件句柄连接- 返回指向该流的文件指针
fgets()
char *fgets(char *str, int n, FILE *stream)从指定的流 stream 读取一行,并把它存储在 str 所指向的字符串内。当读取 (n-1) 个字符时,或者读取到换行符时,或者到达文件末尾时,它会停止,具体视情况而定。- 如果成功,该函数返回相同的 str 参数;如果到达文件末尾或者没有读取到任何字符,str 的内容保持不变,并返回一个空指针;如果发生错误,返回一个空指针。
fputs()
int fputs(const char *str, FILE *stream)把字符串写入到指定的流 stream 中,但不包括空字符。- 该函数返回一个非负值,如果发生错误则返回 EOF。
isalpha()
int isalpha(int c);检查所传的字符是否是字母。- 如果 c 是一个字母,则该函数返回非零值,否则返回 0。
isdigit()
int isdigit(int c);检查所传的字符是否是十进制数字字符。- 如果 c 是一个数字,则该函数返回非零值,否则返回 0。
fork()
pid_t fork(void)会进行系统调用,用于创建一个新进程,称为子进程,它与进程同时运行,此进程称为父进程。在创建新的子进程后,两个进程将执行 fork() 之后的下一条指令。- 返回值: 若成功调用一次则返回两个值,子进程返回 0,父进程返回子进程 ID;否则,出错返回 -1。
waitpid()
pid_t waitpid(pid_t pid,int *status,int options);当指定等待的子进程已经停止运行或结束了,则waitpid() 会立即返回;但是如果子进程还没有停止运行或结束,则调用 waitpid() 函数的父进程则会被阻塞,暂停运行。- waitpid() 函数执行成功,则返回子进程的进程号;如果有错误发生,则返回-1,并且将失败的状态赋值给 status。
shmat()
void *shmat(int shmid, const void *shmaddr, int shmflg)用来启动对共享内存的访问,并把共享内存连接到当前进程的地址空间。- 第一个参数,shm_id 是由 shmget() 函数返回的共享内存标识。
- 第二个参数,shm_addr 指定共享内存连接到当前进程中的地址位置,通常为空,表示让系统来选择共享内存的地址。
- 第三个参数,shm_flg 是一组标志位,通常为 0。
- 调用成功时返回一个指向共享内存第一个字节的指针,如果调用失败返回-1.
isatty()
int isatty(int handle);检查文件描述符指向的设备类型是普通文件,还是设备文件。- 普通文件返回 0,设备返回 -1。
- 常见设备文件:
- stdin 标准输入设备 键盘
- stdout 标准输出设备 显示器
- stderr 标准错误设备
- stdaux 辅助设备
- stdprn 打印机
sscanf()
int sscanf(const char *str, const char *format, ...)从字符串 str 读取输入给 format。- 如果成功,该函数返回成功匹配和赋值的个数。如果到达文件末尾或发生读错误,则返回 EOF。
参考
https://eternalsakura13.com/2020/08/23/afl/#comments
- 本文作者:ShouCheng
- 本文链接:http://shoucheng3.github.io/2022/07/19/2022-07-20-%E5%A4%A9%E9%97%AE%E4%B9%8B%E8%B7%AF%E2%80%94%E2%80%94Fuzz/index.html
- 版权声明:本博客所有文章均采用 BY-NC-SA 许可协议,转载请注明出处!